Today I would like to introduce Juliana, a mum, who will be sharing her experience of creating sensory bins for toddlers on a budget.
Sensory bins are something I came across a little while ago. I mean how can you miss them? If you look just about anywhere on Pinterest for toddler activities you are sure to find elaborate and pricey looking sensory bins filled with expensive toys. It can be really overwhelming to try and figure out where to start not to mention pretty pricey if you’re constantly changing it out every few weeks and making trips to the store for dump trucks. Sensory bins are amazing for keeping toddlers entertained for upwards of 20 minutes at a time. Which, in toddler time, is an eternity. While play should be done with close supervision, there is typically a lot of exploratory play to be had that can be done independently. Which means you finally have time to get those dishes done, or clean that coffee spill.
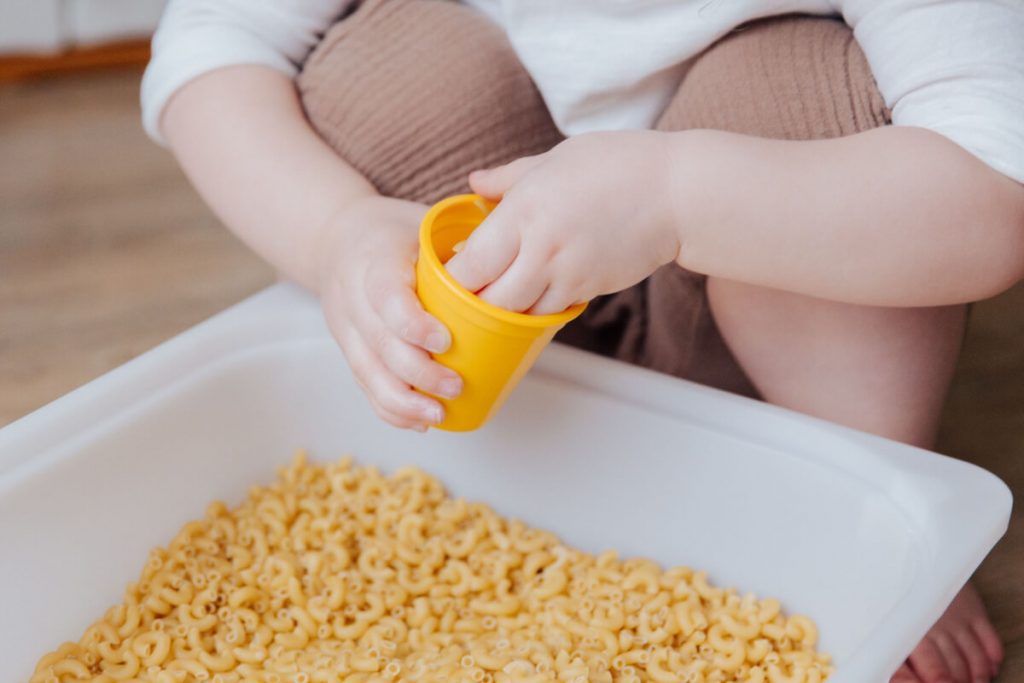
I’m here to show you that having a sensory bin doesn’t have to be a constant headache and break the bank. You can still have a cute sensory bin that the kids will love and a tight budget. When I first decided to start a sensory bin, I paid $3. It consisted of a small bin from the dollar store, some dried pasta, and some spoons and bowls for scooping, which I already had in my arsenal. While I don’t recommend chunky pasta in the long run, which I’ll go into further detail about later, this worked. Seeing how interested my little guy was in sensory play, I knew I needed to up my game a little bit. But I was determined to not spend a fortune doing it. So let’s get into how to create a perfect sensory bin for your budget.
Table of Contents
Bin for Sensory Bin
So of course the first thing you’re going to need for your sensory bin is of course the bin. This is probably the second most important part of the sensory bin. When looking for a bin there are a few things you need to consider:
- The bin needs to be shallow enough for your child to be able to play in.
- Your bin should have a lid to store products safely.
- How you would like to store your sensory bin.
Your first option is the dollar store bin
These are definitely the most affordable option running at about $4, and due to their small size, they are definitely easy to store and tuck away. However, the ones at my dollar store are rather small. This makes it difficult for more than one child to play in, and also tends to be less engaging for the kiddos if they have less room to play. Also, there will be a big mess, because its a lot harder to keep the contents of a sensory bin in the bin when it’s small.
Your second option is using an under bed storage container as a bin
Under bed storage containers are thin and narrow. These are my preferred bins at about $24. Due to the fact that they are shallow, they are quite easy for tiny arms to reach over and play in. They can be put on a coffee table or chairs during play time so that they are at toddler standing height. They are thin and easy to hide under a bed when not in use. These bins are also quite long, which allows for lots of space to play and move. Because of their large size, there tends to be less mess and spills. This means less cleaning for me, so it’s really a win-win.
Your last option is a professional sensory table
These are typically seen in play centres and day cares. They cost about $170 and up. They are the perfect height for kids to play, and are great at keeping most of the mess in. They typically come with a cover and some can even be used as a regular table when they’re not being used for sensory play. However, these are rather large and difficult to hide or store. They require a lot of space and are not something I would recommend unless more than 5 children would be playing with it.
[image]
Here’s an example of the under bed sensory bin I am currently using. I prop it up on an old ottoman that doesn’t really get used. This makes it the perfect height for the kids. When they’re done, I close it up and store it under a table.
Choosing a theme for your sensory bin
So now that you’ve got your bin, you’re ready to fill it. The first thing I recommend doing is to pick a theme. Now while Pinterest is great for this, like I previously stated, if you don’t already have a lot of those things, it could be pricey. So first I would start by having a look at what you already have around the house. If you have tons of dump trucks that aren’t getting much love, you could do a construction sensory bin. However, if you don’t already have dump trucks, that could be pricey. Spoons, bowls and cups make great tools for scooping.
Still not sure? Head to your nearest dollar store and check out what kind of cheap little toys they have. A lot of mine sensory bins align with my children’s interests. For example, bugs and farm animals. You can also use fridge magnets that are shaped like letters and numbers to make an educational sensory bin, and work on recognition.
Fillers for sensory bins
Now that you have a theme in mind its time to choose your filler. This is what your main component will be. It will be the base of play. So when choosing a filler you want to keep in mind that in order for this to be more engaging, it needs to transfer well. Sensory bins are great for learning fine motor skills, like scooping and transferring, so it’s important to have a base that does both these things well. Another reason sensory bins are such a hit is because of the way they feel. Like digging your feet in cool sand. So you want it to have an interesting texture. Something large like pasta might feel cool, but will only hold attention for a small amount of time because it doesn’t transfer or scoop well. Some great examples of fillers are beans, rice, and oats.
Rice as sensory bin fillers
Small and light items, such as rice, are great for transferring and scooping, and work great with water toys. They are also very inexpensive and cost about $5 for a large amount. However, the down side is the mess. My son is very good at keeping the materials in the bin. But due to the lightweight nature, there are a lot of spills. If I’m being completely honest with you, I’m still finding rice in my play room. Its been over a month since we’ve used it. Rice is like the glitter of sensory bins. Works great. Looks great. But you’ll find it in the strangest places, even when it’s been out of use for a long period of time.
Beans as sensory bin fillers
These have a great texture. They are smooth and cool to the touch. They are also available in a variety of colours, which make it great for multiple themes. They transfer and scoop well, but don’t work great with water toys. They also have some weight to them, which means it’s definitely not as messy as rice. This is always a bonus in my books. You’ll probably need a few bags to fill up your bin. It will cost about $6.
Oats as sensory bin fillers
Did you know you can dye oats? This makes for an amazing look, and can really tie in your whole theme. This makes it great for just about anything you had in mind. They also work great for scooping and transferring. They don’t work well with water toys, but their rough texture and softness makes it great for sensory play. These, however, are probably the most pricey of the fillers, costing about $12 to fill a sensory bin.
All of these options are pretty affordable, and the opportunities for fillers are endless, so don’t just limit yourself to what I’ve outlined here. You can use hay, rocks, or even paper shreds. Just keep in mind that lighter materials will make for more mess, and larger materials will make for less engagement.
Sensory bin assembly
So you’ve gotten all of your supplies and now its time to assemble. This is the easy part. All you have to do is throw everything in and you’re good to go. For digging activities, I like to put my small toys in before my filler. This way they are hidden and buried for me. Easy.
Extra elements you can add to sensory bins
Extra elements have taken my sensory bin game up a notch. I find adding extra elements make for higher engagement and longer play time. This means more free time for me to clean. Who am I kidding? More free time for me to scroll on my phone. Think of the theme you’ve chosen and have a look at your local dollar store to see what you can add. If you are using magnets, add a cookies sheet. Draw on the cookie sheet with a white board pen to make it a search and match game. Bug theme? Add some magnifying glasses and binoculars, so the kiddos can explore. Construction site? How about some popsicle sticks or blocks for building. The opportunities are endless with the extras you can add. Trust me, you’ll want to add them. Remember more engagement means more free time for you.
Some examples of my sensory bins
[image]
Here are some examples of sensory bins I’ve created in the past that were a real hit. The cost breakdown is below. I didn’t include the cost of the bin because it was a one time purchase that I don’t have to worry about paying again.
Bug sensory bin
Base – Black beans x 2 bags – $2 each
Toys – Bugs x 4 bags – $1.25 each
Extras – 1 binocular, 1 magnifying glass – $4 each
Total cost – $17
[image]
Alphabet hunt
Base – Rice – $5
Toys – Alphabet – already had, so free
Extra – Cookie sheet – $2
Total cost – $7